I want to start by thanking all the community members of this forum for sharing their knowledge and time spent trying to help newcomers like me, to achieve success and making this forum a very resourceful database. I'm afraid that you cannot learn anything new from this initial stage of my project, cause its all based in the ideas and knowledge that I gathered from reading the forum members work.
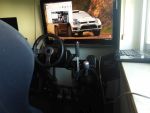
This project started almost one year ago, when I first saw some videos on YouTube about motion rigs. I became very interested because I already had a DIY static rig and was looking for more feeling of the car dynamic behavior, specially on the braking. I realized that I could achieve that in an inexpensive way so I started buying all the parts required. My project is almost 100% based on RacingMat's project except i'll be using one PC only, it will be a seat mover, and for motors feedback I will be using DIY hall sensors instead of potentiometers.
Like I mentioned on my presentation post, I have very little electronics skills, and never worked with Arduino before, so this is a very ambitious project to me, I really hope I can finish it with your help. I will try to describe my work as it progresses as best as I can.
PARTS ACQUIRED, SUPPLIERS & PRICES
-2x SWF VALEO NIDEC ITT 404.458 GEAR MOTOR 24V DC from Smolka (97€ each +shipping fee)
-Power Source HP Proliant DL380 G4 / DL385 G1 Netzteil 575W DPS-600PB B 321632-001 from Ebay (very popular around 17€ each)
-Motor controler Monster moto shield Arduino 2 x 30A VNH2SP30 full-bridge drivers SparkFun UK from Ebay (18€+Shipping fee)
-Arduino Board CH340G ATmega328P UNO R3 Board & Free USB Cable for Arduino DIY from Ebay (4,33€)
-4pcs 12mm Female Threaded Rod End Joint Bearing SI12T/K PHSA12 from Ebay(11,69€)
-Hall sensors SS495A1 from Aliexpress (16,07€ lot of 10 units)
-Skate Ball bearings8mm x 22mm x 7mm double rubber sealing cover deep groove ball bearing for skate scooter from Aliexpress (4,02€ lot of 10 units)
-Neodymium Magnets Block Cuboid 10mm x 5mm x 3mm N35 Neodymium Magnets from Aliexpress (7,14€ lot of 50 units)
-Seat Belt Harness SB Racing Street Belt 4 Point Bolt-In 2" from Aliexpress (33,26€)
-Racing seat i got from local supplier for my static build and costed around 120€
STAGE 1 - DIY Hall sensors
I followed this tutorial from user Gene Buckle http://www.simpits.org/geneb/?p=299 and added a 100nf condenser between negative and signal from hall sensor to reduce electric noise.
I tested them connecting to a G25 pedals wiring harness and used G25 calibration software from Leo Bodnar site to see the results...guess what? They work very well , they are very linear even after I connect the harness to a bodnar cable (higher resolution).
STAGE 2 - Installing Arduino board.
As my Arduino is not an original, it is chinese built, I had some trouble making windows recognize it. So I had to install chinese drivers from these site http://blog.ilc.edu.tw/blog/blog/25793/post/84018/514540 It's written in Chinese language but you can translate it with google translator.
After driver instalation I installed easily Arduino program version 1.6.8 and uploaded Firmware SIRNONAME_FUSION_ARDUINO_2014 because I wanted to mount arduino and motomonster board without wiring, as they have the same pin position its easier to stack them.
I recovered an old PC power source box and mounted the boards inside.
Used an old 486 intel processor aluminium dissipator cut to fit, to cool the H-bridges, and some thermal paste to attach it.
STAGE 3 - Initial tests
This is were the fun begins and also my headache...
I mounted the two motors on a wood board, attached the Hall Sensors to them, revised all the wiring's, connected the power source and BANG!!!...nothing happen. I tried sending hexa commands in Arduino Serial Monitor like I learned from RacingMat's post http://x-sim.de/forum/viewtopic.php?t=1617 but I got no movement at all. I had set the right COM port, the right Baud rate, etc.I started X-Sim and both motors rotated 180 degrees and stop. Then I noticed that the lights on the Arduino board were off. Applying a little pressure with my fingers on the stacked boards, the Arduino lights would lit and then off again. I think this is the result of my lousy soldering skills...
So now I took everything apart, and I will redo all the soldering when I have free time to do it...
This is the current stage of my build and I will keep posting my development and the many doubts that inevitably will appear in the process.