Arduino Open Source X-PID firmware incl.360°option
Re: Arduino Open Source X-PID firmware incl.360°option
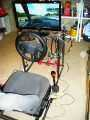
![]() by sirnoname » Wed 24. Apr 2013, 19:34
by sirnoname » Wed 24. Apr 2013, 19:34
Now, after it was verified, I have updated the 360° full turn option in the ino file. A new plugin is not needed.
If a answer is correct or did help you for a solution, please use the solve button.
-

sirnoname - Site Admin
- Posts: 1829
- Images: 45
- Joined: Thu 1. Sep 2011, 22:02
- Location: Munich, Germany
- Has thanked: 35 times
- Been thanked: 129 times
Re: Arduino Open Source X-PID firmware incl.360°option
![]() by vicpopo » Tue 30. Apr 2013, 20:39
by vicpopo » Tue 30. Apr 2013, 20:39
Hi ,
I tested the firmware xpid from Sirnoname and that had well worked.
I was looking for a cheap solution (driver+ h-bridge) to build just for fun a G-seat.I want to feel what could be the sensations with this solution.I want to use 4 wiper motors.
For positioning, I used one effet hall sensor (ss495) with two magnets.It's simple to build.I glued a shaft at the opposite side from the output shaft and I glued the 2 magnets.At the begining from the video you can watch the sensor mounting.
To setup the positioning I reduce the range from 30 to 980 and with 3% dead zone.
With the other setup sensor full range 0 to 1023 and 5% dead zone the wiper motor had overshooten its position and made a full turn.
With the last setup it seems to be ok.
I used the first arduino firmware not the last (360° sensor).
Thank to Sirnoname and one notice I had once the error "dll interface was not loaded" at the end of the video.I red the forum and I used a short usb cable and I powered the arduino board with 9 V.Eventhough this error happened.
Below the video .
-

vicpopo - Posts: 645
- Joined: Fri 20. Apr 2012, 18:04
- Location: Strasbourg France
- Has thanked: 39 times
- Been thanked: 80 times
Re: Arduino Open Source X-PID firmware incl.360°option
![]() by wlady » Tue 7. May 2013, 01:17
by wlady » Tue 7. May 2013, 01:17
Hello everybody,
I'm realizing a project with arduino uno R3 and this motor shield:
https://www.sparkfun.com/products/10182
I've applied some little modification to sirnoname PID firmware, just to change output pin and adapt them to sparkfun board, connection two 10k potentiometers to A4 and A5. I attach here the modified piece of code:
int portdstatus =PORTD; // read the current port D bit mask
int ControlPinM1Inp1 =7; // motor 1 INP1 output, this is the arduino pin description
int ControlPinM1Inp2 =8; // motor 1 INP2 output, this is the arduino pin description
int ControlPinM2Inp1 =4; // motor 2 INP1 output, this is the arduino pin description
int ControlPinM2Inp2 =9; // motor 2 INP2 output, this is the arduino pin description
int PWMPinM1 =5; // motor 1 PWM output
int PWMPinM2 =6; // motor 2 PWM output
// Pot feedback inputs
int FeedbackPin1 = A4; // select the input pin for the potentiometer 1, PC0
int FeedbackPin2 = A5; // select the input pin for the potentiometer 2, PC1
I'm experiencing a lot of problems, in PID tuning my motors go only in one direction, also potentiometers values are not update correctly.
Anyone tried with that board successfully ? Any help?
Thanks
- wlady
- X-Sim Supporter
- Posts: 6
- Joined: Wed 24. Apr 2013, 12:35
- Has thanked: 0 time
- Been thanked: 0 time
Re: Arduino Open Source X-PID firmware incl.360°option
![]() by wptm » Tue 7. May 2013, 03:23
by wptm » Tue 7. May 2013, 03:23
Hello wlady,
I would not change the arduino code for your motor shield. I'd just connect the original pinouts to this red board's corresponding pins.
I would not change the arduino code for your motor shield. I'd just connect the original pinouts to this red board's corresponding pins.
-
wptm - Posts: 64
- Images: 57
- Joined: Tue 29. May 2012, 21:43
- Location: Hungary
- Has thanked: 8 times
- Been thanked: 4 times
Re: Arduino Open Source X-PID firmware incl.360°option
![]() by RufusDufus » Tue 7. May 2013, 12:11
by RufusDufus » Tue 7. May 2013, 12:11
Hi BobBuilt, Have you found those driver boards need much heatsinking? If so do you use heatsink, fans or both? Am I correct in understanding they use the same driver chips as the jrk12v12?
- RufusDufus
- Posts: 25
- Images: 0
- Joined: Fri 26. Apr 2013, 14:39
- Location: Australia
- Has thanked: 1 time
- Been thanked: 1 time
Re: Arduino Open Source X-PID firmware incl.360°option
![]() by RafBR » Tue 7. May 2013, 19:49
by RafBR » Tue 7. May 2013, 19:49
How many dof one arduino uno is able to control with the current firmware?
If I want to build a 4dof do I need to use two UNO's ?
Thanks!
If I want to build a 4dof do I need to use two UNO's ?
Thanks!
-

RafBR - X-Sim Supporter
- Posts: 136
- Images: 24
- Joined: Tue 20. Mar 2012, 21:53
- Location: Brasil
- Has thanked: 6 times
- Been thanked: 4 times
Re: Arduino Open Source X-PID firmware incl.360°option
![]() by Racerr87 » Tue 7. May 2013, 21:09
by Racerr87 » Tue 7. May 2013, 21:09
RafBR wrote:How many dof one arduino uno is able to control with the current firmware?
If I want to build a 4dof do I need to use two UNO's ?
Thanks!
Correct
- Racerr87
- Posts: 40
- Images: 7
- Joined: Mon 7. May 2012, 17:01
- Has thanked: 3 times
- Been thanked: 5 times
Re: Arduino Open Source X-PID firmware incl.360°option
![]() by wlady » Wed 8. May 2013, 00:16
by wlady » Wed 8. May 2013, 00:16
[quote="BobBuilt"]Correct way of adapting to test wptm I have tested this card but not to a complete setup only manage to get this driver fully running under prilads code.
But wired correctly can not see an issue, by the way don't plug this board on as a shield the code will not work correctly as the cspins do not need to be connected as they seem to cause a conflict with the code. Didn't not investigate any further sorry.
Sorry re wire to match original code and don't plug it in like a shield. Once all running you will be able to to test by changing the code.
Another issue with pots is quality of pots, and need to be wired directly to the ard not through the shield.
Here is how I wired it for prilads code as an example. Note pot wiring not shown and should be wired directly to analog pins on the Ard.
 [/quote
Hi BobBuilt,
I've tried your suggestions with orginal sirnoname firmware with no luck (disconnected shield and connected only useful pins with wires). What I cannot understand is why you say to connect motorshield on ARDUINO to pins 8-13 while in firmware code motor pins are 2-5. Below code for reference:
int ControlPinM1Inp1 =2; // motor 1 INP1 output, this is the arduino pin description
int ControlPinM1Inp2 =3; // motor 1 INP2 output, this is the arduino pin description
int ControlPinM2Inp1 =4; // motor 2 INP1 output, this is the arduino pin description
int ControlPinM2Inp2 =5; // motor 2 INP2 output, this is the arduino pin description
int PWMPinM1 =10; // motor 1 PWM output
int PWMPinM2 =9;
I've conntected pots to analog pins A0 and A1; values are read correctly for 5 seconds about and then the software stops to read values.
Also my ARD board is quite different (I'm using UNO R3)....What I'm doing wrong ?
thanks for help
But wired correctly can not see an issue, by the way don't plug this board on as a shield the code will not work correctly as the cspins do not need to be connected as they seem to cause a conflict with the code. Didn't not investigate any further sorry.
Sorry re wire to match original code and don't plug it in like a shield. Once all running you will be able to to test by changing the code.
Another issue with pots is quality of pots, and need to be wired directly to the ard not through the shield.
Here is how I wired it for prilads code as an example. Note pot wiring not shown and should be wired directly to analog pins on the Ard.
Hi BobBuilt,
I've tried your suggestions with orginal sirnoname firmware with no luck (disconnected shield and connected only useful pins with wires). What I cannot understand is why you say to connect motorshield on ARDUINO to pins 8-13 while in firmware code motor pins are 2-5. Below code for reference:
int ControlPinM1Inp1 =2; // motor 1 INP1 output, this is the arduino pin description
int ControlPinM1Inp2 =3; // motor 1 INP2 output, this is the arduino pin description
int ControlPinM2Inp1 =4; // motor 2 INP1 output, this is the arduino pin description
int ControlPinM2Inp2 =5; // motor 2 INP2 output, this is the arduino pin description
int PWMPinM1 =10; // motor 1 PWM output
int PWMPinM2 =9;
I've conntected pots to analog pins A0 and A1; values are read correctly for 5 seconds about and then the software stops to read values.
Also my ARD board is quite different (I'm using UNO R3)....What I'm doing wrong ?
thanks for help
- wlady
- X-Sim Supporter
- Posts: 6
- Joined: Wed 24. Apr 2013, 12:35
- Has thanked: 0 time
- Been thanked: 0 time
Re: Arduino Open Source X-PID firmware incl.360°option
![]() by tronicgr » Wed 8. May 2013, 16:00
by tronicgr » Wed 8. May 2013, 16:00
A better quality USB cable would probably solve these serial errors.
But there is something else that I'm surprised that the whole arduino community haven't realized. Since the arduino uses 16Mhz crystal its impossible to get reliable serial communication in certain baud rates. In fact, if you take a look in this Baud Rate Calculation chart you will see that at 16Mhz ALL speeds give some error.
Next to it there is a chart for 18.432Mhz crystal... Its all green!
Thanos
Signature below...:
My project presentations on x-sim3:
Digital dashboard with TM1638 and Arduino Nano v3
Thanos AMC1.6 USB Motion Controller
Visit My Blog for updates and news on 6DOF AMC1280USB controller: motionsim.blogspot.com
My project presentations on x-sim3:
Digital dashboard with TM1638 and Arduino Nano v3
Thanos AMC1.6 USB Motion Controller
Visit My Blog for updates and news on 6DOF AMC1280USB controller: motionsim.blogspot.com
-

tronicgr - Posts: 624
- Images: 11
- Joined: Tue 20. Mar 2012, 22:10
- Location: San Diego, CA
- Has thanked: 130 times
- Been thanked: 50 times
Re: Arduino Open Source X-PID firmware incl.360°option
![]() by wptm » Wed 8. May 2013, 16:25
by wptm » Wed 8. May 2013, 16:25
wlady wrote:I've conntected pots to analog pins A0 and A1; values are read correctly for 5 seconds about and then the software stops to read values.
What kind of pots do you use? I've had a strange situation with my cheap pots when I removed the stop cam to get free turn.
When it was positioned in the area where with the stop cam should not be, it's made a short and my arduino was blinking and restarting. Then I repaired it not to have there the sort.
So I'm just thinking if you have a similar situation there, after the 5 sec.
I still suggest to you not to change the original firmware. Just wire everything according to the red boards pins.
You can also do a test with leds connected to the pinouts of the arduino firmware. This is just to assure you, if the communication works between computer and arduino. I've just finished such a board for testing purpose.
-
wptm - Posts: 64
- Images: 57
- Joined: Tue 29. May 2012, 21:43
- Location: Hungary
- Has thanked: 8 times
- Been thanked: 4 times
Return to Controllers and Drivers Projects
Who is online
Users browsing this forum: No registered users and 2 guests
