My name is Alex and I am located in Texas, USA. I would like to share one of my projects which began nearly 3 years ago. I'll be
adding to this project page for the next few days as I try and dig up old pictures and convert old video files.
Prolog
--------
I purchased a Logitech G27 racing wheel for my PC because racing games on my PC just wasn't cutting it any more with an
XBOX 360 controller. After a few months of playing with my steering wheel attached to my desk, the shaking monitor
drove me crazy because of the force feedback vibrations, and the pedals under my desk kept slipping and sliding around.
Having the H-shifter attached to the desk next to the wheel just didn't feel natural either. I wanted something better. I needed
something better. I couldn't believe this was the best it could get.
So, I decided to search the internet for a solution. There had to be a stand alone frame of some kind that could support the
wheel, pedals, and H-shifter away from the pc desk and make it all feel more natural.
2009
------
I discovered this incredible piece of software, X-Sim by Sirnoname, and this amazing DIY community. This was how
it all began for me. I spent months reading everything I could find about how to start my very own project. The more I read,
the more I realized I had no idea what to do, or where to begin. ( this will probably start sounding familiar to some of you) The
more lost I became, the more my determination grew. The more projects I read, the more inspired I became. "If they could do it,
so can I", I began dreaming.
2010
------
I had to ask my wife, ( who was my fiancé at the time) what she thought about my crazy idea to build a sim. I was scared she would say "NO". My dreams would be over, and I would have to live with my G27 mounted to my PC desk forever. Instead,
she was supportive and said, "do whatever makes you happy". YES!
The new year, new resolution, new project would finally begin. I settled on building my first sim. After all my research,
I concluded that a 2dof style sim using 2 x SCN-5 actuators would be the way to go for me. So, I began by sketching ideas, drawing
some plans, making a list of things I would need, and "attempted" to set some sort of budget and time frame for this project.
I finally had a starting point.
Item List
==========
SCN5 150mm Actuators x 2 https://miraiintertech.com/e-store/products/SCN5.html
USB-RS485 Communications Module x 2 http://www.robot-electronics.co.uk/htm/usb_rs485_tech.htm
or
USB-COM485-PLUS1 x 2 http://www.ftdichip.com/Products/Modules/USBRSxxx.htm
24VDC @ 6.5A Power Supply x 1 - local electronic store
USB cables ( A to B ) x 2 - local electronic store
Misc wiring and cabling - local electronic store - Help with wiring diagrams - http://www.x-sim.de/manual/scn5_6.html
Control Box to put it all in.
Universal-Joint for pivot mount under seat - try ebay or local car shops.
Heim Joints x 4 - ebay
Vibration Isolator Mounts x 2 http://www.grainger.com/Grainger/MASON-Floor-Mount-Vibration-Isolator-4C877
Seat Mover Frame made from 8020 T Slot Aluminum Extrusion
8020 Ebay Store http://stores.ebay.com/8020-Inc-Garage-Sale?_trksid=p2047675.l2563
8020 T Slot Aluminum Extrusion 15 S 1515 ULS x 96.5 x ??
80/20 Inc 15 Series 1.5" x 1.5" Ultra Lite Smooth T-Slot Aluminum Extrusion, Part # 1515-ULS x 96.5" Long.
2 - 72"
5 - 8"
4 - 21"
6 - 17 1/4"
1 - 19"
1 - 39 1/2"
2 - 14 3/4"
2 - 23 1/4"
2 - 33"
4 - 30"
1 - 31 1/2"
5 - 11 1/2"
1 - 12 1/4"
4 - 14"
80/20 T Slot Hardware 15 S Blank Roll In T-Nuts x 180+
15 Series BLANK Roll-In T-Nuts x .875" Long. Create your own 15 Series Roll-In T-nuts. Create thread tap of your choice.
A ton of bolts.
Custom made T-Slot Aluminum brackets x
28 - 1 1/2" x 3" x 3"
16 -1 1/2" x 2" x 2"
2 - 1 1/2" x 2" x 1/2"
2 - 1 1/2" x 3" x 7"
1 - 2" x 1 1/2" x 1 1/2"
Why did I choose this material for building the frame?
Strong, easy to work with, and you can build anything like industrial LEGOS. Perfect for first prototype(s).
( Make sure you have proper equipment & tools to cut, drill and thread )
APC Race Seat x 1 - online merchant
Buttkicker x 1 http://thebuttkicker.com/
Pre existing items prior to starting this project...
Logitech G27 FFB Steering Wheel http://gaming.logitech.com/en-us/product/g27-racing-wheel
PC Specs ( Present Day ) - Home brew
Windows 8 Pro x64 - Intel Core i7 CPU - 6GB RAM
1.5 TB Raid 0
Geforce GTX-460 x 2 sli
Project Summary
---------------------------------------------------------------------------------------------------------------------------------
Budget................... $1800 - $2300 ( mistakes happen, things break, learn as you go)
Project Build Time..... 3 months research. 3 months build time. 3 months making changes.
Experience Level....... Novice
Difficulty................. Difficult at first, learning curve was achievable over a reasonable period of time.
Watching my family & friends drive this thing........ PRICELESS!
----------------------------------------------------------------------------------------------------------------------------------
Let me apologize in advance for some of the pictures, some were taken with an older mobile phone with no
flash 3 years ago. When I began this project, I was so excited to hurry and finish, I didn't consider taking many pictures
during the build process. I will try and explain as much of it as I can while referencing some of the pictures.
Video clips will be added as well.
1st version build
It was about 3 am and my father, who was a big help during this whole process, was passed out on the couch next to the chair waiting to see if all that time and money was going to be worth the effort. I was frantically trying to get
X-sim and the rig to do something, anything. There was no way I was going to sleep until this thing showed some kind
of life that night. All the sudden, the chair sprang to life, it centered itself and let us know it was ready!
My father jumped up from a dead sleep when he heard the sudden jerk from the chair. His eyes wide open along with a
huge smile on his face. For months we planned on having a dead weight in the chair as the test dummy before we
would risk trying it for ourselves. Well, that idea lasted about .03 seconds. He yanked the dead weight off the chair
and jumped on it first. He seemed more excited than I was! So, I fired up Dirt 2 and sent him on his merry way.
That was the best night EVER! ( video to come )
After all the excitement died down, we learned a few things. The frame wasn't designed for the pedals ( how did I miss that
little detail? ). So we had to build a box from some scrap plywood as a temporary fix. The plywood you see laying under the chair
was thrown under there because the base was jumping all over the place and we were afraid to scratch/crack the tile floor. Another
temp fix until we solved that issue in the next revision build.
We needed a few of these leveling feet.
Next we added a cross bar to the base frame to stabilize the wobbling.
2nd version build
Yes, that's sponge bob hanging on the wall. We won't discuss the details of that for * Moving along....
By this point, I had to relocate the project to my wife's apartment because I unofficially started living with her
( fiancé back then ). She was a trooper during these next few months putting up with this monster taking up the living room in her
1 bedroom apartment. Did I mention the apartment was on the 2nd floor? Remember the bouncing around I mentioned earlier?
Well, at this point I still didn't have the leveling feet yet. So the only way to continue using this thing without vibrating the
whole apartment, was to come up with some kind of massive vibration absorption solution under the frame.
It wasn't pretty, but it worked! So here's a tip for anyone with a similar setup and problem. Try small inflatable tires. Just take the
center out , and inflate the tube to about 50%-60%. I also used about 2" stiff foam between tire and floor. Problem solved, no
more vibrations on the floor. No unhappy neighbors. Progress continues.
10 in. Pneumatic Tire with White Hub
Now, I began trimming extra weight from the sim. I discovered the cross framing behind the seat was overkill and not necessary.
The chair could handle the actuators mounted directly to the back of it. So I cut that giant chunk of weight completely off.
The next step was to remove the H-shifter from the static mount on the floor frame, then add it to the moving upper frame
where the seat is attached.
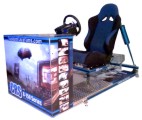
final version
So by this time, I've stripped down all the unnecessary framing, and finalized the framing cuts & sizes. I anodized the aluminum
mounts for the actuators to match the color theme. I added an aluminum diamond plate to the floor frame under the feet area.
Then I printed some custom graphics and spruced up the sim a bit. At least it's not a giant hunk of aluminum sitting in the
middle of the living room anymore.
First video added....
This was the very first time powering up the simulator and it was hilarious. Obviously profiles were no where near optimal.
But it was still a lot of fun messing around for a while. He's not really driving, the steering wheel wasn't plugged in yet. I was driving on the couch
next to the sim with a keyboard. He was just along for the ride.
This was the next day after a few modifications were made to make it a bit more stable. And I added a few more test subjects to try it out.
Here's a couple more videos I found and pieced together to show the final version in motion.
2011-2012
-------------
New version update.... New final welded steel frame model... More detailed pictures below
New aluminum mounts for SCN5 actuators, anodized new color for new seat color theme...
U-Joint mounted to new welded steel frame... much smaller footprint from previous model size.
New red APC seat mounted to U-joint and steel frame...
Rear frame mount for actuators
Heim joints bolted to frame
Both actuators mounted to seat back
front frame mount for G27 wheel and pedals
Everything put together...
What's new for 2013? That project will be continued on a separate project page soon...
More to come! Please feel free to comment or ask questions.... Thanks for checking out my projects